LAMY Safari · Reverse Engineering
A LAMY Safari fountain pen, taken apart, measured to 0.01mm, rebuilt in Rhino, rendered in KeyShot.
This project, Reverse Engineering, was the core assignment for ART 277-801 Digital Fabrication at UWM's Peck School of the Arts, taught by Matthew Vivirito (Spring 2024).
The brief asked us to choose a complex utilitarian object (ideally something mechanical, something with multiple parts that interact) and rebuild it from scratch in Rhino. Not a stylized version, not an interpretation. A 1:1 reconstruction, accurate enough that the rebuilt model would behave like the real object if you printed it.
I chose the LAMY Safari fountain pen.
The Safari is small, but it's not simple. It's a fountain pen with five distinct parts that thread, snap, and seat into each other with the kind of tolerance that only works because the original was designed at industrial precision. Picking it was a deliberate choice: it looked like a small object that would force me to be exact.
The challenge was less about the geometry and more about the discipline. Every measurement had to be taken with a digital caliper to 0.01mm, recorded, and then re-measured if the model didn't seat properly. The nib in particular, the smallest part of the pen, has a curvature that's nearly impossible to read from the outside. Getting that one part right took longer than the rest of the pen combined.
How it was made
Disassembly and measurement
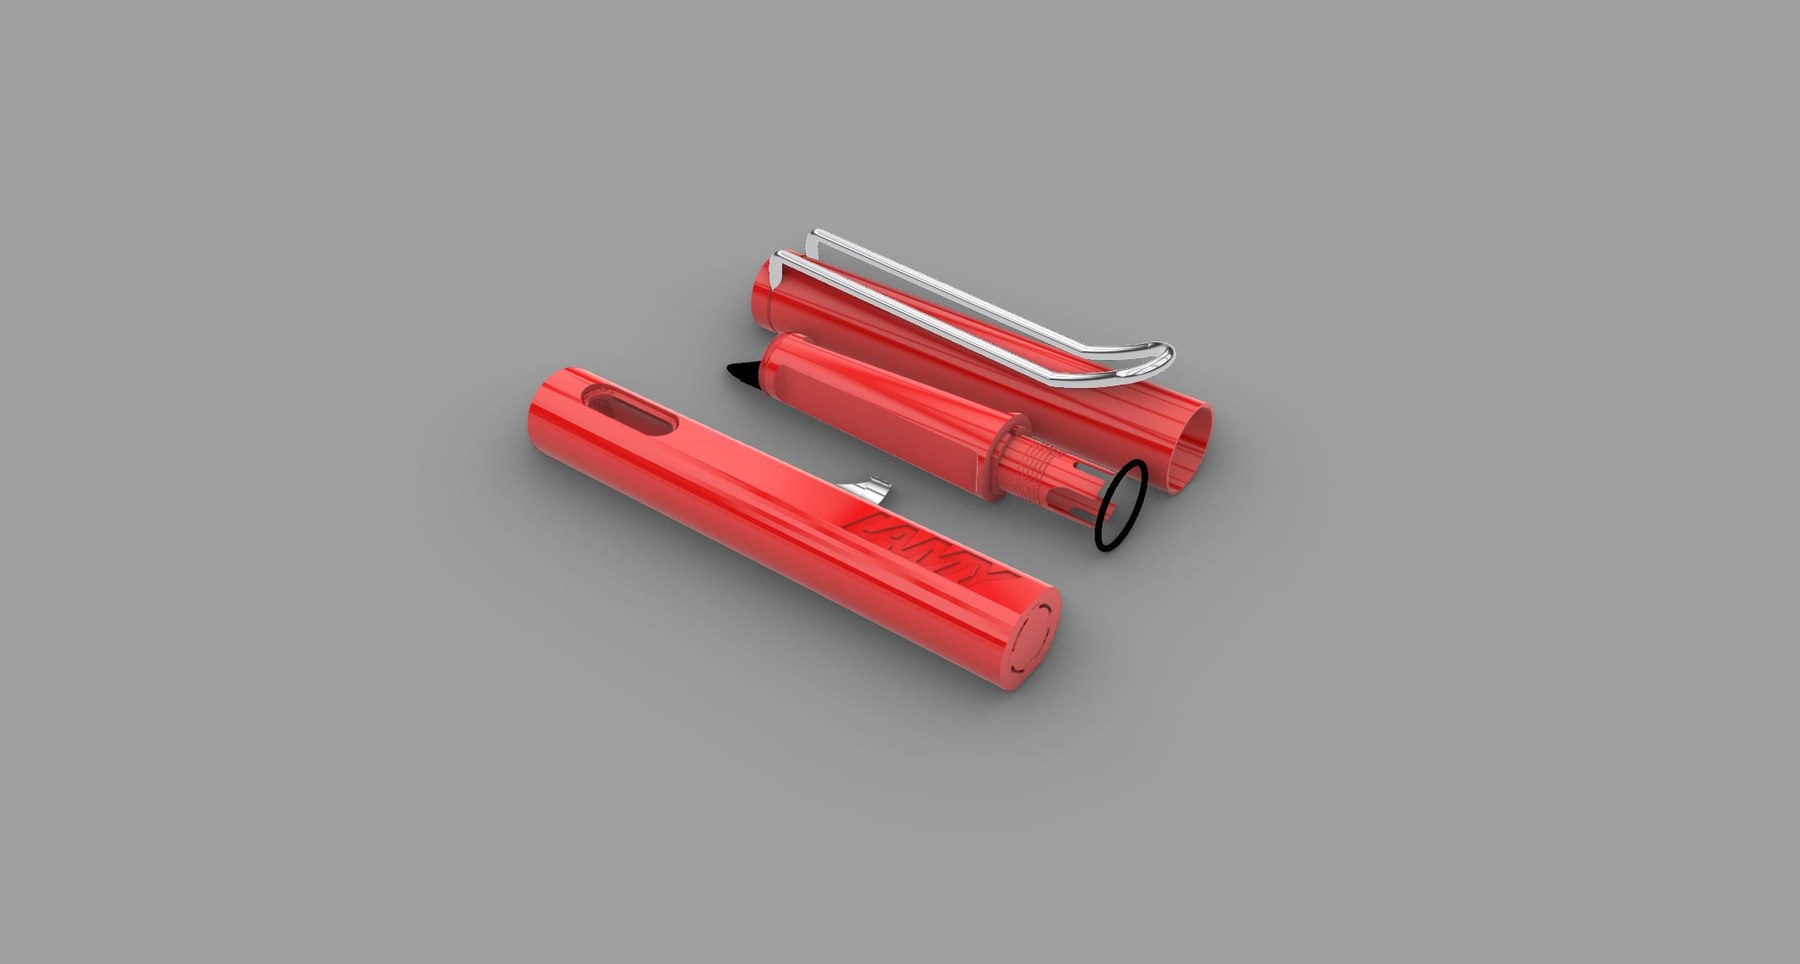
The pen was taken apart down to its five components: barrel, cap, clip, grip section, and nib. Each part was measured with a digital caliper to 0.01mm precision. Outer diameters, inner diameters, thread pitches, transition radii, the depth of the ink window cutout. Every dimension recorded before any modeling started.
Modeling in Rhino 8
The model was built in Rhino 8, one part at a time. Working from the measurement sheet, each component was reconstructed as its own object, organized into a clear layer system grouped by material and function. The discipline of Rhino layer organization (every part on its own layer, materials grouped, naming consistent) turned out to be the real lesson of the project. Once the layer system was right, every later step (rendering, exploded views, orthographic drawings) became significantly faster.
The nib · the hardest part
The nib's curvature was the single hardest measurement of the project. It's the smallest component, and its working surface is a compound curve that doesn't read accurately from any single angle of the caliper. It required multiple measurement passes from different orientations, cross-checked against the assembled pen, before the rebuilt nib seated correctly in the grip section.
Orthographic documentation
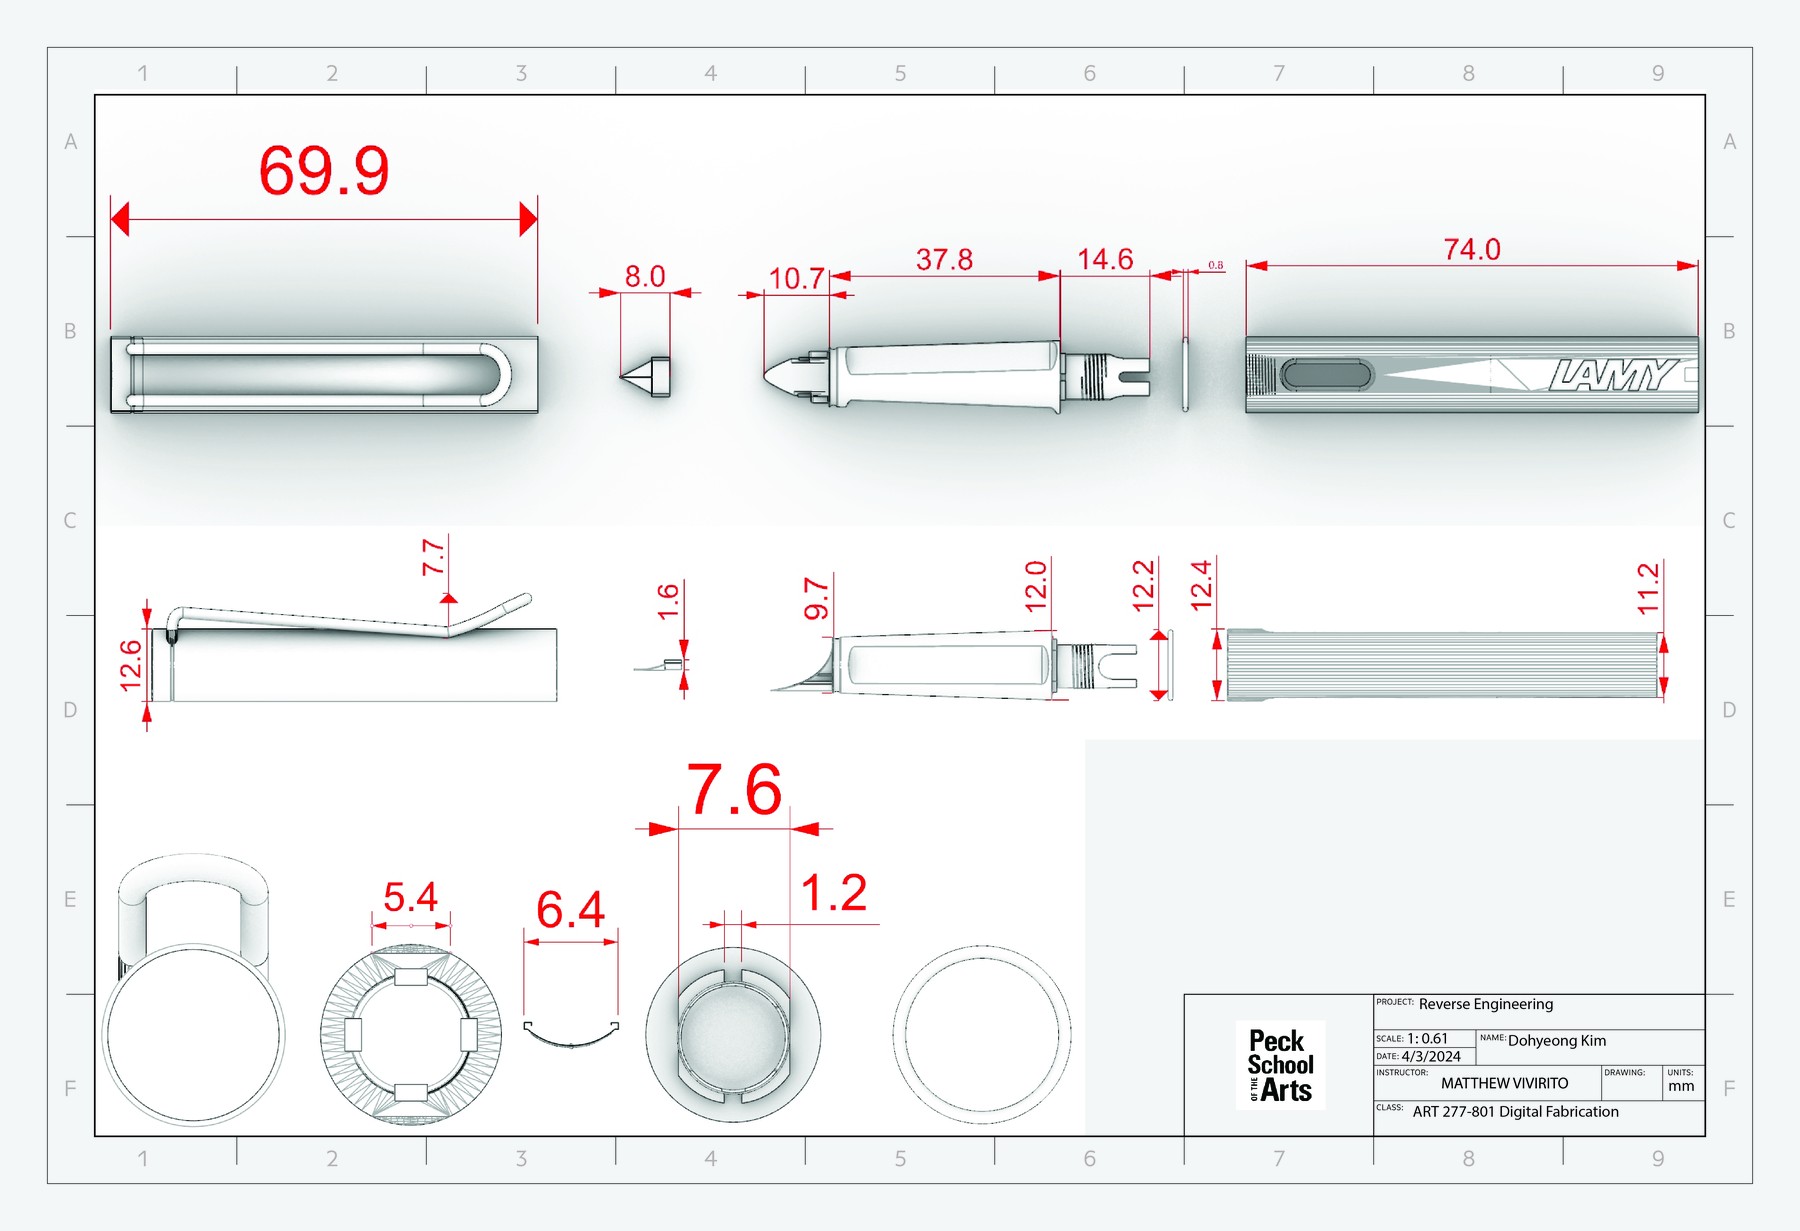
A full orthographic drawing was produced as the technical record of the build. Every dimension annotated, every component shown in plan and elevation, scaled 1:0.61 on the standard Peck School title block.
Rendering in KeyShot
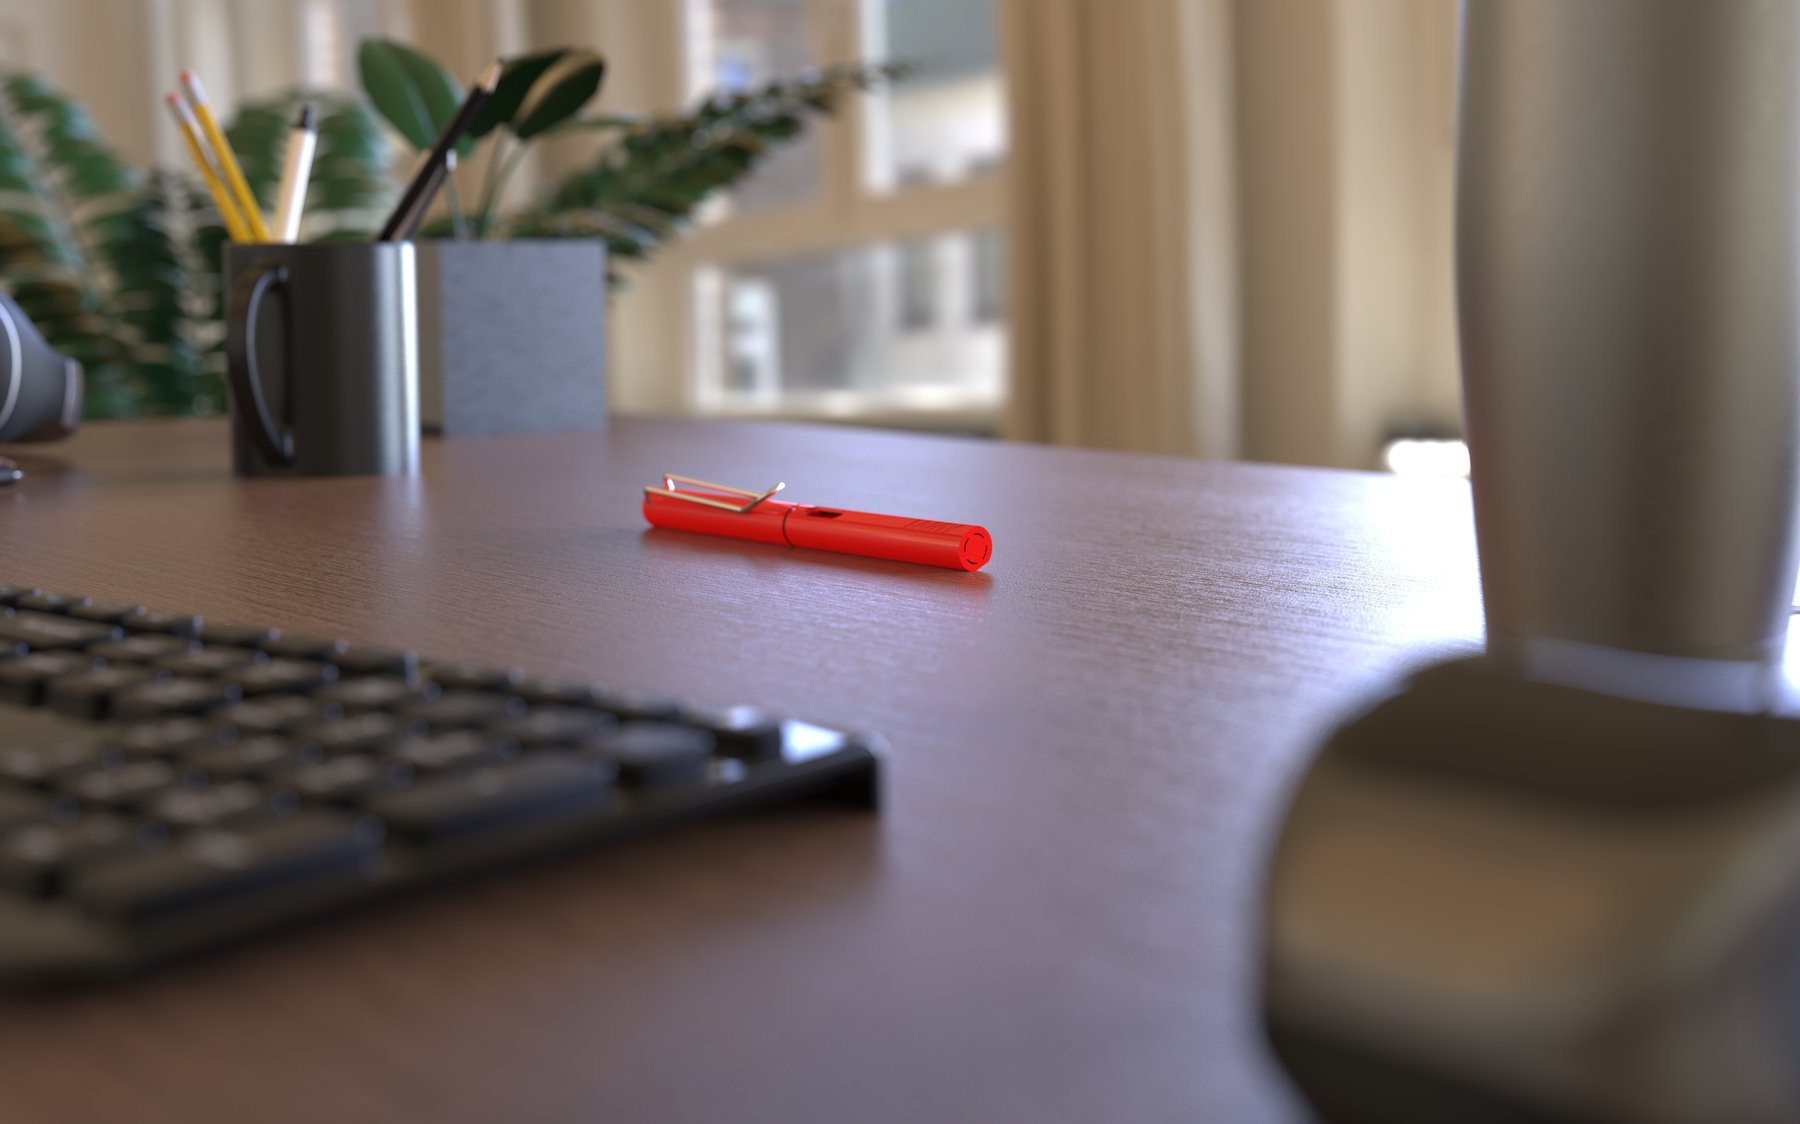
Final rendering moved to KeyShot. The pen was placed in a desk environment to read as a real object in real space, not a product shot floating on white. The materials (red ABS body, brushed steel clip, black nib) were tuned to match the real pen as closely as possible.
The Reverse Engineering project changed how I work in Rhino more than anything else I've done in the program. Modeling something to 0.01mm precision forces a level of file discipline (layers, grouping, material organization) that carries into every project after it. My current Rhino workflow comes directly from this assignment.
It also made the connection between physical measurement and digital workstation concrete. The two used to feel like separate practices; after this project, they read as one.